Shamrock Pixie Tutorial
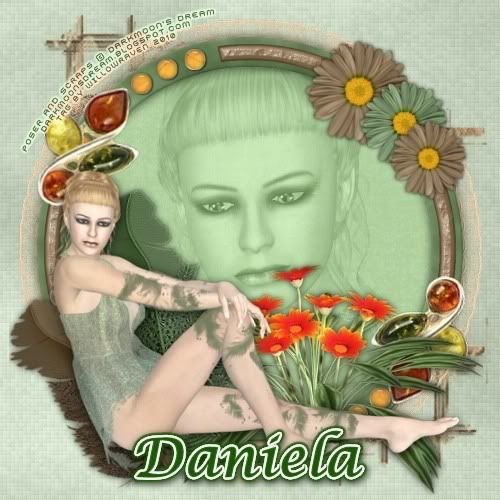
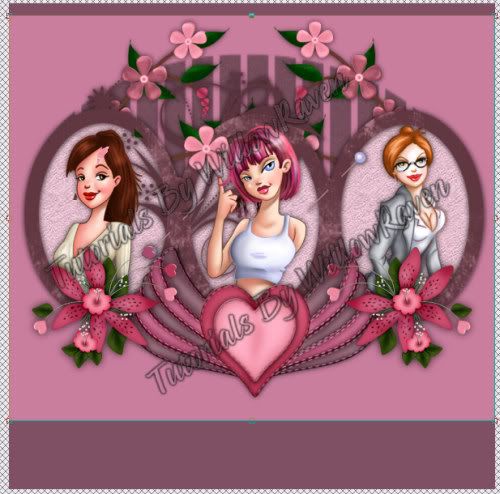
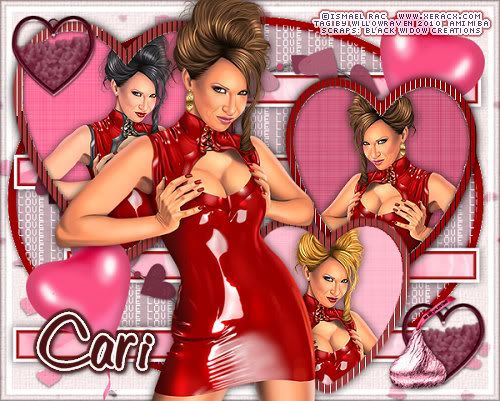
This is the tag we will be making

Moderate level - Some knowledge of PSP is needed.
Materials Needed
Paint Shop Pro (used Version 9, but can be done on any version)
PTU kit "Shamrock Pixie" by Darkmoon's Dream Designs which can be bought at Scrappin Bratz
Poser used from the kit
Filters Needed
Xero-Porcelain - FTU filter
Blinds (comes with PSP),
Optional Filter
Eye Candy 5 Impact Gradient Glow
Fonts used
FFF Fuego (for copyright info)
Doodle Journal - PTU font (for name/text)
Please note that I will give the drop shadow settings that I have used HOWEVER feel free to use your own settings if you would like.
1. Open PSP. Open New File: 600 pixels x 600 pixels, 72.000 pixels/inch resolution, transparent. At this time, also open your mask and minimize in PSP.
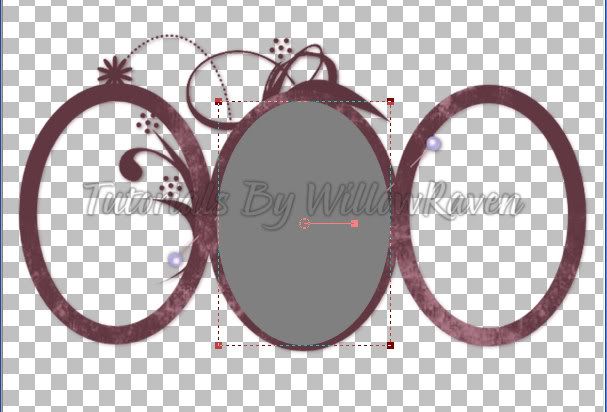
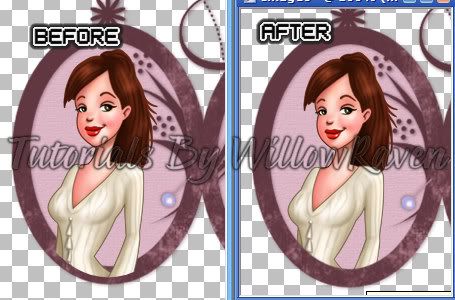
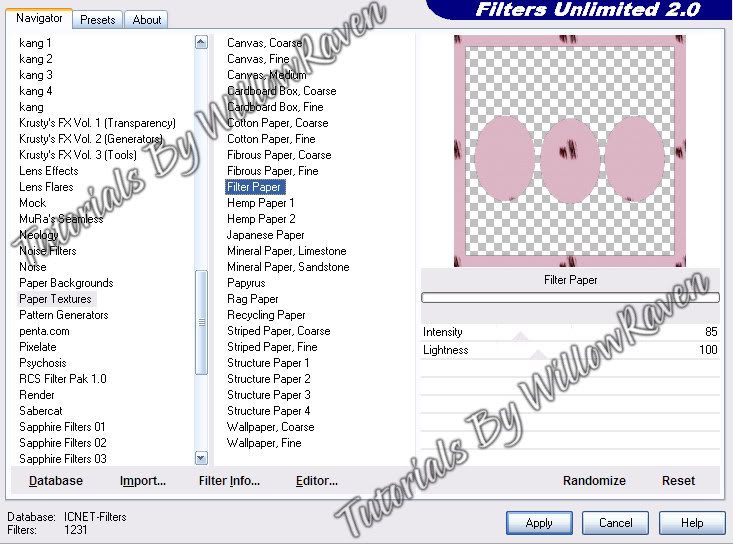
2. Open one of the frames in the kit (I used Frame04). Copy and paste as new layer on your blank "new file" then resize it 80% (be sure "all layers" is UNchecked). Copy and paste Paper14 as new layer then resize it 70% (be sure "all layers" is UNchecked). Move to just below your frame layer. Click inside the frame making sure that the entire area inside is clicked, then close off the frame layer, then make the paper layer active. Go to Selections - Select All, Selections - Float, Selections - Defloat. The go to Selections - Modify - Expand - by 10 pixels - then click OK. Go to Selections - Invert and then click your Delete key. Selections - Select None and then click on the frame layer, making it visible again. Go to Selections - Select All, Selections - Float, Selections - Defloat then apply your Xero/Porcelain effect using the following settings:
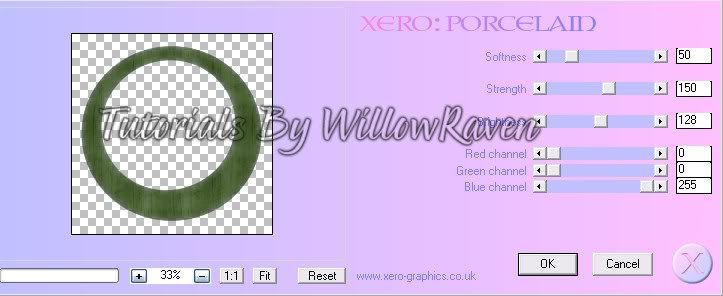
Go to Selections - Select None (to remove marching ants).
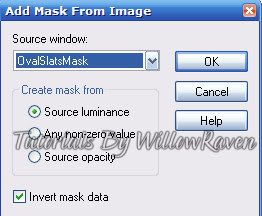
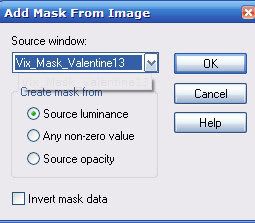
3. Copy and paste Paper14 as new layer then resize it 75% (be sure "all layers" is UNchecked). Move to just below your frame background layer. Go to Layers - New Mask Layer - From Image and apply these settings:
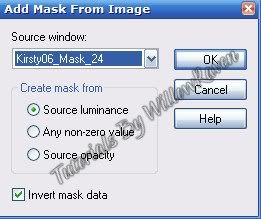
Go to the layer palette - right click on the "Group - Raster 2" layer, Merge - Merge Group. Feel free to close the mask that you have minimized.
4. Copy and paste one of the pixies (I used Pixie01) as new layer then resize it 35% (be sure "all layers" is UNchecked). Move to top in the layer palette. Move to left side of tag (see my tag for idea).
5. Copy and paste the mushroom as new layer then resize it 25% (be sure "all layers" is UNchecked). Move to just below the pixie layer. Duplicate then resize the duplicate by 75% (be sure "all layers" is UNchecked), then place them as shown on tag. Do the same thing with one of the chests (I used Chest02) - resize to 35% instead, and do not duplicate - and move that to the layer between the pixie and the mushroom.
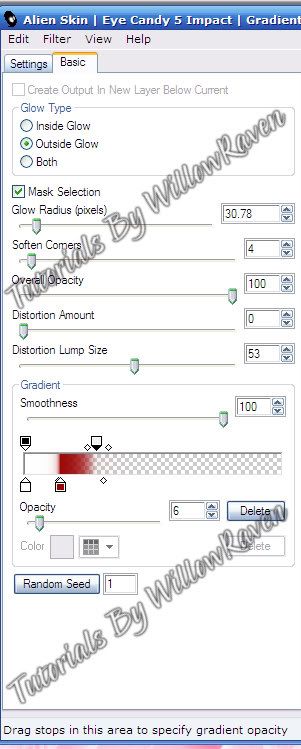
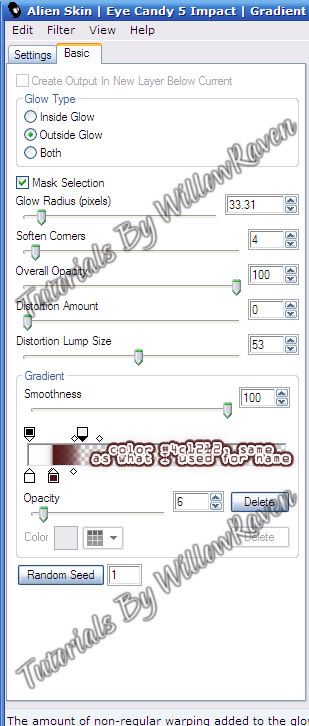
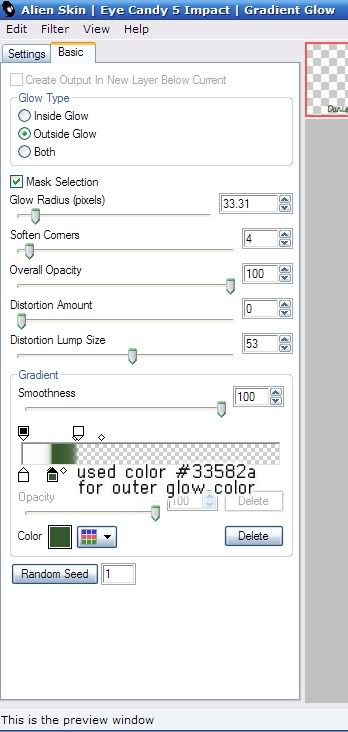
6. Copy and paste one of the swirls (I used Swirl01) as new layer then resize it 60% (be sure "all layers" is UNchecked). Move it to layer just under the mushroom, then place it behind his head (as shown on tag). Duplicate swirl, then go to Image - Flip, then Image - Mirror. Move the swirl around til it is placed somewhat on the right bottom of the frame (see my tag for idea). If desired, resize the bottom swirl by 85% - some of it still might run off the area, that is ok. Use Eye Candy 5 Impact, Gradient Glow and these settings:
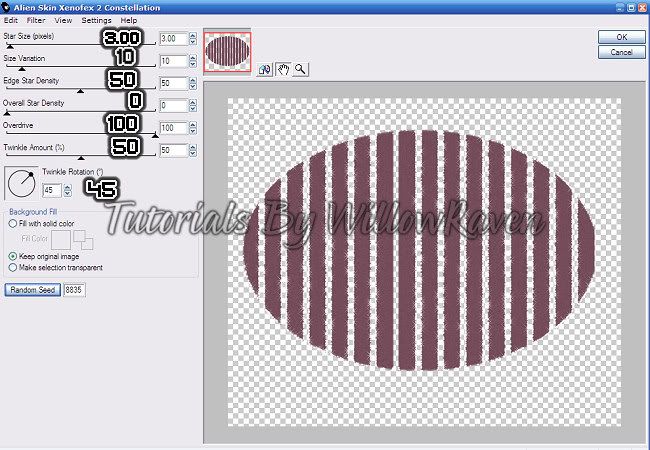
7. Copy and paste Splatter01 as new layer then resize it 60% (be sure "all layers" is UNchecked). Move to just below your frame layer, then move it around so it is somewhat centered under the frame. Go to Effects - Texture Effects - Blinds and use the following settings:
width: 5
opacity: 25
color: black
horizontal: unchecked
light from left/top: unchecked
Then go to Adjust - Brightness and Contrast - Brightness/Contrast and use these settings:
brightness: 15
contrast: 0
Go to Eye Candy Impact, Gradient Glow and use the previous settings.
8. Copy and paste Shamrocks01 as new layer then resize it 50% (be sure "all layers" is UNchecked) then go to Image - Rotate - Free Rotate using these settings:
Direction: right
Degrees: 90
All Layers: unchecked
Rotate Single layer around canvas center: unchecked
Center it (somewhat) within the frame, as seen on my tag. Sharpen, if needed.
9. Copy and paste Grass03 as new layer then resize it 40% (be sure "all layers" is UNchecked), then place it just above the mushroom layer.
10. Copy and paste Flower07 as new layer then resize it 35% (be sure "all layers" is UNchecked), then place it just above the top swirl layer, as seen on the tag.
11. Apply drop shadow to all layers (except mask layer and pixie layer) with these settings - or your preferred settings:
vertical: 2
horizontal: 0
opacity: 75
blur: 7.00
color: black
shadow on new layer: unchecked
(note: on frame layer, I applied the drop shadow twice)
On the pixie layer, use the following settings:
vertical: 0
horizontal: 0
opacity: 70
blur: 20.00
color: black
shadow on new layer: unchecked
(note: I didn't apply a drop shadow on the mask layer, however you may if you prefer.)
12. At this point, feel free to decorate further, using elements in the kit. When you have it all decorated, go to you layer palette, right click, then Merge - Merge Visible all the layers. Then resize to 450 pixels x 450 pixels - all layers checked. Go to Adjust - Sharpen. (You might need to do this more than once.)
13. Apply copyright information and tagger watermark. (I used Pixelette for mine.)
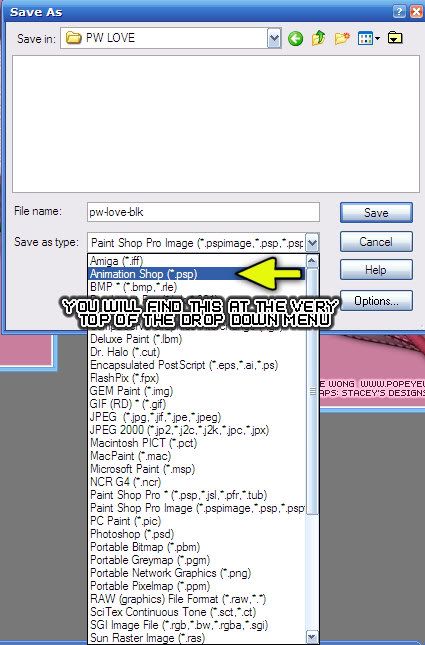
14. Merge Visible, save in .png format (to retain background transparency).
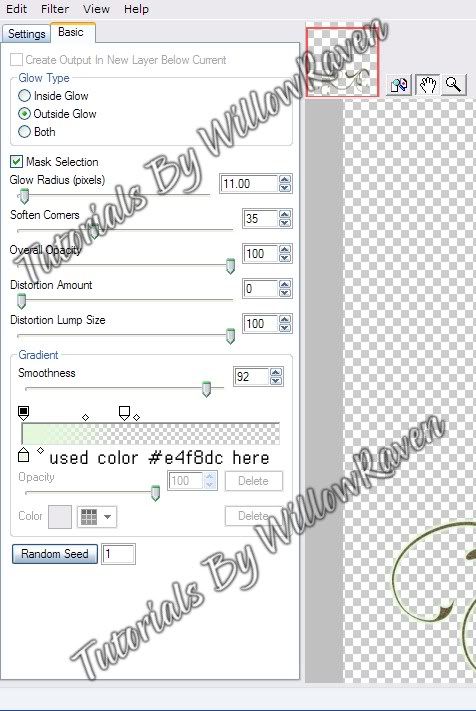
15. Apply name and place in center of bottom of frame area (see my tag for idea). For mine I used the font Doodle Journal, with #33582a as my foreground and background colors. I did stroke 3.0 and size 48 on the font, and used the following Eye Candy 5 Impact - Gradient Glow settings:
and then did the following drop shadow settings:
Vertical: 2
Horizontal: 0
Opacity: 75
Blur: 8.00
Color: Black
Shadow on New Layer: Not checked
And that's it!!
Thank you so much for checking out my tutorial and I would love to see your results!
*~*~*~*~*~*~*~*~*~*~*~*
Check out this wonderful result from Lorri, a fellow member on the Shewolf's Domain groups:
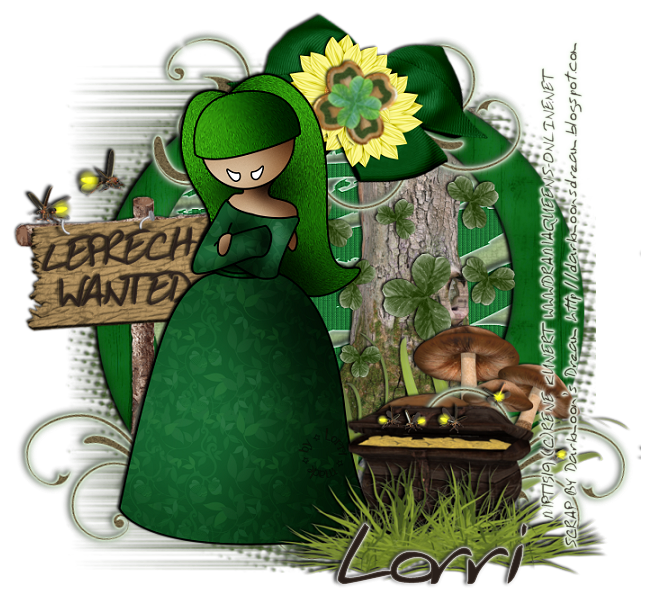
Absolutely amazing! Thank you Lorri, for sharing your result!!
This is the tag we will be making

Moderate level - Some knowledge of PSP is needed.
Materials Needed
Paint Shop Pro (used Version 9, but can be done on any version)
PTU kit "Shamrock Pixie" by Darkmoon's Dream Designs which can be bought at Scrappin Bratz
Poser used from the kit
Kirsty's Scraps Mask #24
Filters Needed
Xero-Porcelain - FTU filter
Blinds (comes with PSP),
Optional Filter
Eye Candy 5 Impact Gradient Glow
Fonts used
FFF Fuego (for copyright info)
Doodle Journal - PTU font (for name/text)
Please note that I will give the drop shadow settings that I have used HOWEVER feel free to use your own settings if you would like.
1. Open PSP. Open New File: 600 pixels x 600 pixels, 72.000 pixels/inch resolution, transparent. At this time, also open your mask and minimize in PSP.
2. Open one of the frames in the kit (I used Frame04). Copy and paste as new layer on your blank "new file" then resize it 80% (be sure "all layers" is UNchecked). Copy and paste Paper14 as new layer then resize it 70% (be sure "all layers" is UNchecked). Move to just below your frame layer. Click inside the frame making sure that the entire area inside is clicked, then close off the frame layer, then make the paper layer active. Go to Selections - Select All, Selections - Float, Selections - Defloat. The go to Selections - Modify - Expand - by 10 pixels - then click OK. Go to Selections - Invert and then click your Delete key. Selections - Select None and then click on the frame layer, making it visible again. Go to Selections - Select All, Selections - Float, Selections - Defloat then apply your Xero/Porcelain effect using the following settings:

Go to Selections - Select None (to remove marching ants).
3. Copy and paste Paper14 as new layer then resize it 75% (be sure "all layers" is UNchecked). Move to just below your frame background layer. Go to Layers - New Mask Layer - From Image and apply these settings:

Go to the layer palette - right click on the "Group - Raster 2" layer, Merge - Merge Group. Feel free to close the mask that you have minimized.
4. Copy and paste one of the pixies (I used Pixie01) as new layer then resize it 35% (be sure "all layers" is UNchecked). Move to top in the layer palette. Move to left side of tag (see my tag for idea).
5. Copy and paste the mushroom as new layer then resize it 25% (be sure "all layers" is UNchecked). Move to just below the pixie layer. Duplicate then resize the duplicate by 75% (be sure "all layers" is UNchecked), then place them as shown on tag. Do the same thing with one of the chests (I used Chest02) - resize to 35% instead, and do not duplicate - and move that to the layer between the pixie and the mushroom.
6. Copy and paste one of the swirls (I used Swirl01) as new layer then resize it 60% (be sure "all layers" is UNchecked). Move it to layer just under the mushroom, then place it behind his head (as shown on tag). Duplicate swirl, then go to Image - Flip, then Image - Mirror. Move the swirl around til it is placed somewhat on the right bottom of the frame (see my tag for idea). If desired, resize the bottom swirl by 85% - some of it still might run off the area, that is ok. Use Eye Candy 5 Impact, Gradient Glow and these settings:

7. Copy and paste Splatter01 as new layer then resize it 60% (be sure "all layers" is UNchecked). Move to just below your frame layer, then move it around so it is somewhat centered under the frame. Go to Effects - Texture Effects - Blinds and use the following settings:
width: 5
opacity: 25
color: black
horizontal: unchecked
light from left/top: unchecked
Then go to Adjust - Brightness and Contrast - Brightness/Contrast and use these settings:
brightness: 15
contrast: 0
Go to Eye Candy Impact, Gradient Glow and use the previous settings.
8. Copy and paste Shamrocks01 as new layer then resize it 50% (be sure "all layers" is UNchecked) then go to Image - Rotate - Free Rotate using these settings:
Direction: right
Degrees: 90
All Layers: unchecked
Rotate Single layer around canvas center: unchecked
Center it (somewhat) within the frame, as seen on my tag. Sharpen, if needed.
9. Copy and paste Grass03 as new layer then resize it 40% (be sure "all layers" is UNchecked), then place it just above the mushroom layer.
10. Copy and paste Flower07 as new layer then resize it 35% (be sure "all layers" is UNchecked), then place it just above the top swirl layer, as seen on the tag.
11. Apply drop shadow to all layers (except mask layer and pixie layer) with these settings - or your preferred settings:
vertical: 2
horizontal: 0
opacity: 75
blur: 7.00
color: black
shadow on new layer: unchecked
(note: on frame layer, I applied the drop shadow twice)
On the pixie layer, use the following settings:
vertical: 0
horizontal: 0
opacity: 70
blur: 20.00
color: black
shadow on new layer: unchecked
(note: I didn't apply a drop shadow on the mask layer, however you may if you prefer.)
12. At this point, feel free to decorate further, using elements in the kit. When you have it all decorated, go to you layer palette, right click, then Merge - Merge Visible all the layers. Then resize to 450 pixels x 450 pixels - all layers checked. Go to Adjust - Sharpen. (You might need to do this more than once.)
13. Apply copyright information and tagger watermark. (I used Pixelette for mine.)
14. Merge Visible, save in .png format (to retain background transparency).
15. Apply name and place in center of bottom of frame area (see my tag for idea). For mine I used the font Doodle Journal, with #33582a as my foreground and background colors. I did stroke 3.0 and size 48 on the font, and used the following Eye Candy 5 Impact - Gradient Glow settings:

and then did the following drop shadow settings:
Vertical: 2
Horizontal: 0
Opacity: 75
Blur: 8.00
Color: Black
Shadow on New Layer: Not checked
And that's it!!
Thank you so much for checking out my tutorial and I would love to see your results!
*~*~*~*~*~*~*~*~*~*~*~*
Check out this wonderful result from Lorri, a fellow member on the Shewolf's Domain groups:

Absolutely amazing! Thank you Lorri, for sharing your result!!