Snowtime Tutorial
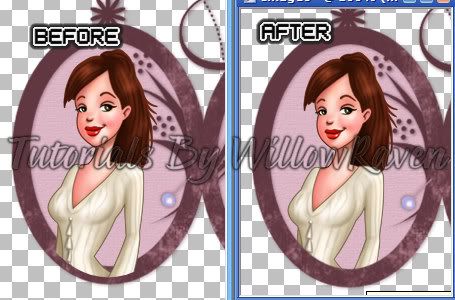
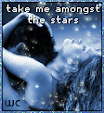
This is the tag we will be making:

Easy to Medium level - Basic knowledge of PSP is needed.
Materials Needed
Paint Shop Pro (used Version 9, but can be done on any version)
Image/Photo of Choice - I used "Below Freezing" by Mis - I have her Unlimited License to use this. If you would like to use it too, you can get this amazing image at Indie-Zine
Postage Stamp Template and Blue Snowflake "Dangle" by Me , in zipfile, HERE
Filters Needed
Blinds - comes with PSP
DSB Flux - Bright Noise (or the noise filter in PSP if you don't have this filter -- settings for this filter will be in parenthesis in the area that calls for the DSB Flux filter)
VM Natural - Lightburst -- shareware, found HERE
Optional Filters (for Name/Text)
Eye Candy 4000 - HSB Noise
Eye Candy 5 Impact - Gradient Glow
Fonts used
KR Kinda Flakey (for shape)
Ambitsek (for copyright info)
Signboard Font (for name/text), (free for personal usage)
Please note that I typically add my drop shadows last. I will give the drop shadow settings that I have used at the end of the tutorial HOWEVER feel free to use your own settings if/when you would like.
1. Install the font. (Alternative: You can open and minimize the font; it should show in PSP. I use a font program called Cfont Pro (http://www.veign.com/application.php?appid=101) - it temporarily installs the font and will uninstall it when you shut down your computer.)
2. Open a new file, 600 pixels x 700 pixels, 72 ppi, transparent. Flood fill with white. At this time, also Shift+D on your image (this will make a copy of your image) - then close out the original, then minimize it for the time being.
3. Go to your materials palette and choose a complementary dark color as your foreground and a lighter version of that color as your background. (I used #215475 for my foreground and #e0eff8 for my background.) Activate your text tool with these settings:
Create as: Vector
Direction: Arrow Pointing Down (1st option)
Font: KR Kinda Flakey
Size: 450
Stroke: 4.0
Alightment: Center
Anti-Alias: Smooth
Line Style: Solid
(the rest of the settings don't matter for this particular part of the tutorial)
Choosing a snowflake that you like, type it out (I used Shift + F). When happy, go to Objects - Align - Center of Canvas. While its still in vector format, do any moving around that you might need if it doesn't fit the canvas or you wish to make any adjustments. Once happy, convert it to raster.
4. Go to the stamp template, and copy and paste the following layer to your snowflake file: white stamp cutout (should be the layer directly under "black insert"). If not already, move it to the layer above your snowflake. Close out the snowflake layer, then go back to the stamp template layer. Using your magic wand tool, click on the inside of the stamp. Go to Selections - Modify - Expand .. by 6.0 pixels. Go to your image and resize if needed (I ended up having to size mine down to 425 pixels x 637 pixels so that it would fit decently in the stamp frame.) Move the image around so that the part you want in the frame is within the marching ants. Once satisfied, go to Selections - Invert then click on your "Delete" button. Selections - Select None. Move image just under the stamp layer. In your layer palette, you will want to lock the stamp layer and the image layer together:
<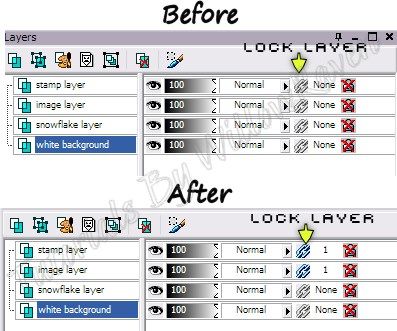

That way when/if we need to move them, they will move together and you won't need to keep matching it up.
5. Take your snowflake layer and duplicate it 3 times (so you will have a total of 4 layers). On the very bottom snowflake layer, go to Image - Rotate and use the following settings:

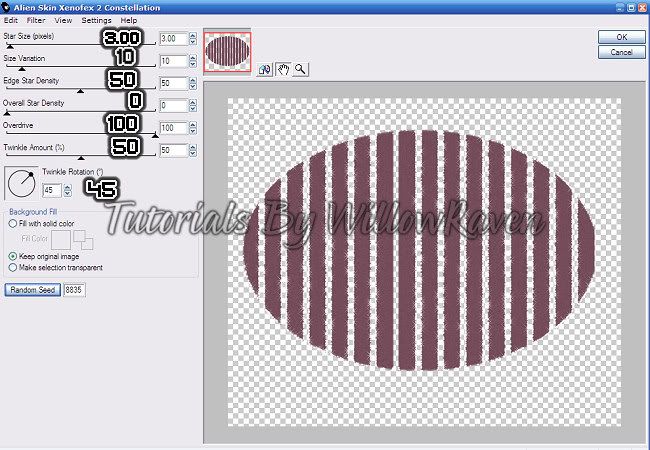
Then resize it by 85%. Adjust - Blur - Gaussian Blur ... by 10.0 pixels. Effects - Texture Effects - Blinds with these settings:

Go to the bottom snowflake layer and apply the DSB Flux - Bright Noise filter with the following settings:
Intensity: 50
Direction: Mix
Apply the same filter on the other 2 layers EXCEPT when you do each layer, click on "Mix" twice before clicking "OK".
(**IF you are using the Noise filter that comes with PSP, go to Adjust - Add/Remove Noise - Add Noise and use the following settings: Uniform, Monochrome checked ... on bottom snowflake layer use noise of 40%, middle layer use noise of 50%, on top layer use noise of 45%)
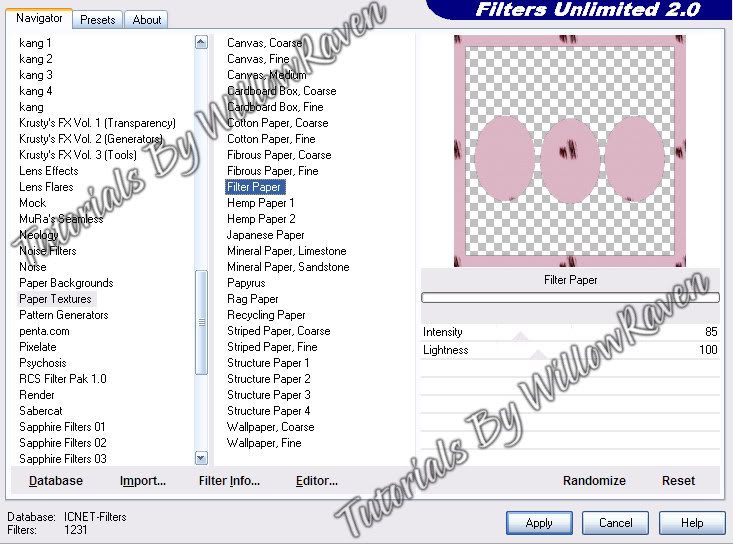
6. Go to your stamp layer and go to Adjust - Color Balance - Manual Color Correction ... and color it to complement the colors you are using with your snowflake and image (I am using a icy blue color). When using this, be sure your source color is the color you are starting with (white, in this case) and the target color is the one you want your frame to be. Then apply the VM Natural - Lightburst filter with the following settings:

(I'm using mine through Filter Unlimited 2.0 however the settings will be the same regardless of whether you run it through a filter program or directly.)
7. Copy and paste the snowflake dangle to your tag file.... arrange to top layer and resize as needed. (I resized mine to 55%.) Arrange on right side of tag (see mine for idea).
8. Resize to 500 pixels x 500 pixels ... 72.000 ppi.... Weighted Average ... "all layers" CHECKED. Feel free to use the crop tool to crop out any additional edges from the tag. Use the Sharpen option (Adjust - Sharpness - Sharpen) if needed to clarify your layers.
8. Apply any desired drop shadows to the layers ... I used the following with the Drop Shadow settings:
On stamp frame and dangle:
Vertical and Horizontal: 0
Opacity: 45
Blur: 8.00
Color: black (or a dark shade of what you are using -- not black unless black is a major color on your tag)
On the noised snowflake layers:
Vertical : 0
Horizontal: 0
Opacity: 55
Blur: 11.00
Color: #244d64 (I used the dark foreground color I used earlier)
Shadow on new layer: unchecked
I did not apply any drop shadow to the image or the very bottom snowflake layer (with the gaussian blur and blinds filter).
10. Apply crediting information and watermark. If you wish to make this a non-animated tag, close out 2 of the noised snowflake layers, then merge visible. Apply name text and then you are done!
(If you want to animated the tag, see below)
~Animation Shop Directions ~
If you are wanting to animate your tag, after you apply your crediting information and watermark, do the following.
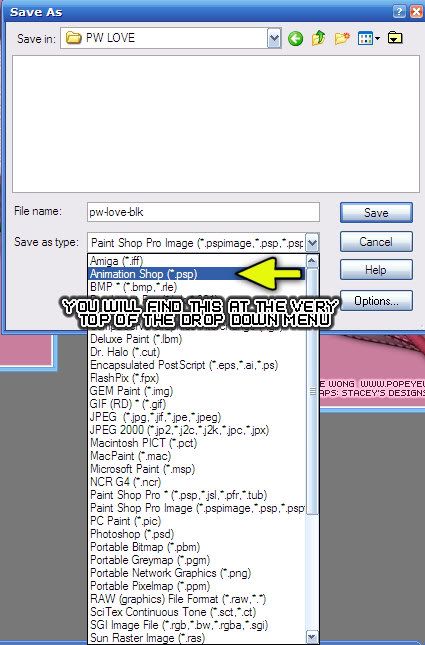
1. Close out the top and middle noised snowflake layers. Go to Edit - Copy Merged ... Edit - Paste as New Image. Then close out the bottom noised snowflake layer and unhide the middle one. Go to Edit - Copy Merged.... Edit - Paste as New Layer ... do the same thing for the last noised snowflake layer. You should now have 3 layers. When you save, save as "Animation Shop .psp":

Open Animation Shop ....
File - Animation Wizard ... using these settings:
1st window: Same size as the first image frame (ticked) (next)
2nd window: Tranparent (ticked) (next)
3rd window: Upper left corner of the frame (ticked) / With the canvas color (ticked) (next)
4th window: Yes, repeat the animation indefinitely (ticked) / How long ... : 30 (next)
5th window: click "Add Image", browse to location of your file then click "open", then "next"
6th window: Finish
Your animation will now show up in Animation Shop.
2. Go to View - Animation to check if it is running at a desired speed. Feel free to modify the speed if you would like. (To do that, go to Edit - Select All (or CTRL + A) and then right click on the first frame and go to Frame Properties and change the number... a smaller number will make it run faster, a larger number will make it run slower. ... when happy with settings, click OK. You can check them by going to View - Animation.) ... I ended up changing mine to 15.
3. Now, I always save a blank of my tag on my computer so that I can tag it for people later on. So I will save the tag with the default settings (what AS installed with) ... usually these settings work ok (however red tones are pretty iffy) ... here is what I used:

Click on the CUSTOMIZE button and use these settings:


click OK ... all the way until it saves your tag.
Now all you need to do is put the name on it! Go to PSP and, using your text tool, make up your name. (I'll give you my settings at the end) ... Once you have your text the way you like, copy it, and then bring it over to Animation Shop and paste it. The click on CTRL + L twice (this will put 2 more layers of your name after the current animation frame, which is your first name frame).
You should now have 3 name frames. While you have your names active, go to Edit - Select All (or CTRL + A), then Edit Copy (or CTRL + C) .... then go to your tag, click inside the 1st frame, then go to Edit - Select All (or CTRL + A) and then Edit - Paste - Into Selected Frame (or CTRL + E) .... place name where you want ... when happy, left click your mouse... name will place in the frame your own AND the other frames. Feel free to go to View - Animation to see the tag with name on it. When happy, save tag with previous settings, being sure to change saved name so that you don't save over your blank template. (For example, my blank tag is name MIS-Snowtime_ani-blk.gif ... so my tagged tag would be something like MISSnowtimeMisbyWR.gif.)
And you're done!!!
~NOTE~ For name/text:
I did the text at size 56, stroke 2.0 .. foreground and background colors the same as used in tutorial... kern: 0.0
I applied Eye Candy 4000 - HSB Noise with the following settings:

And then I used Eye Candy 5 Impact - Gradient Glow with the following settings:

And then used the following drop shadow
Vertical : 2
Horizontal: -2
Opacity: 30
Blur: 14.00
Color: black
Shadow on new layer: unchecked
and done!
I'd love to see what you come up with and thanks for checking out my tutorial!