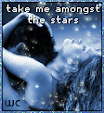
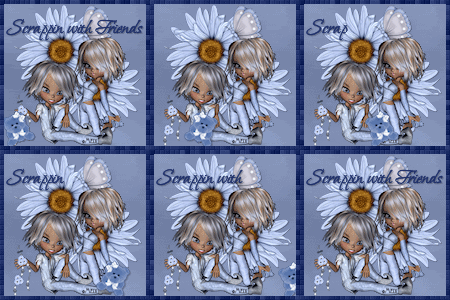
This is the tag we will be making:

Moderate level - Some knowledge of PSP is needed.
Materials Needed
Paint Shop Pro (used Version 9, but can be done on any version)
PTU kit "Atomic Bop" by Immortal Dreams which can be bought at Scrappin Bratz
Poser from Lisa at Sophisticated Scraps
Chelle/WeeScotsLass Mask #127
Tag Template #34 from Kristin at Toxic Desirez
Gradients teom_085 and teom_130 (provided HERE)
Filters Needed: Eye Candy 4000 Glass and Eye Candy 5 Impact Gradient Glow
Fonts used: copy 10_56 (for copyright info), Tattoo Ink (for name/text)
1. Open PSP. Open tag template, click on Shift +D to duplicate, then close original. Delete the crediting layer. At this time, also open your mask and minimize in PSP.
3. Go to AB-Paper 10 from the kit - Copy, then go to the template and Paste as New Layer right above the Bars layer. Rename it Paper 10. Resize (Image - Resize) 65%, All Layers UNchecked.
3. Make Bars layer active then go to Selections - Select All.... Selections - Float .... Selections - Defloat. You will now have marching ants around the bars. Make the Paper 17 layer active by clicking on it.
4. Selections - Invert. Click on the Delete Button. Paper 10 should now be where the bars now are/were. Go to Selections - Invert. Now the inside of the bars is active again.
5. Apply the following drop shadow:
Vertical and Horizontal: 0
Opacity: 75
Blur: 12.00
Color: black
Shadow on new layer: unchecked
Go to Selections - Select None. Delete the bars layer.
6. Go to AB-Paper 15 from the kit - Copy, then go to the template and Paste as New Layer right above the Circle layer. Rename it AB-Paper 15. Resize (Image - Resize) 65%, All Layers UNchecked.
7. Make Circle layer active then go to Selections - Select All.... Selections - Float .... Selections - Defloat. You will now have marching ants around the circle. Make the Paper 15 layer active by clicking on it.
8. Selections - Invert. Click on the Delete Button. Paper 15 should now be where the bars now are/were. Go to Selections - Invert. Now the inside of the circle is active again.
9. Apply the following drop shadow:
Vertical and Horizontal: 0
Opacity: 75
Blur: 12.00
Color: black
Shadow on new layer: unchecked
Go to Selections - Select None. Delete the circle layer.
10. Click on the crop tool and go to Merged Opaque. Move the cropping window around so you crop away the drop shadowing along the outer edges of the template. Click the check mark to crop.
11. Make Notes layer active then go to Selections - Select All.... Selections - Float .... Selections - Defloat. You will now have marching ants around the notes. Add new raster layer right above the notes layer, then flood fill with the gradient teom_085. (In the gradient palette, use these settings: Angle 45, repeats 6, radial).
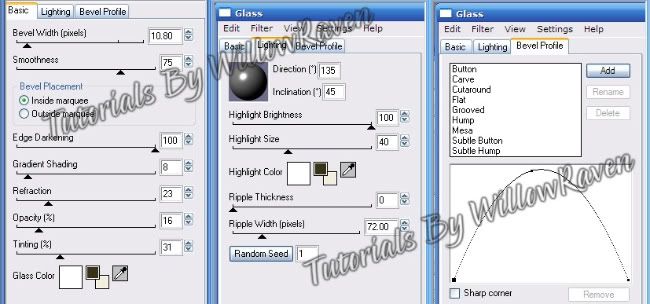
12. Using Eye Candy 4000, Glass, apply these settings:
Use the following drop shadow:
Vertical and Horizontal: 0
Opacity: 75
Blur: 8.00
Color: black
Shadow on new layer: unchecked
13. Do the same thing with the stars, using gradient teom_130. (The only change is, when using the Eye Candy 4000 filter, change the bevel profile to button.)
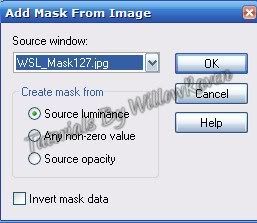
14. Click on the background layer. Take a paper of your choice (I used AB-Paper 12) and copy and paste as new layer just above the background layer. Resize (Image - Resize) 70%, All Layers UNchecked. Go to Layers - New Mask Layer - From Image and use these settings:
11. Go to Layer Palette, click on the Group - Raster 3. "Right click", go to Merge - Merge Group. Resize (Image - Resize) 110%, All Layers UNchecked. Apply drop shadow used on papers layer.
12. Copy and paste poser from kit - place it in the center of the tag. Resize (Image - Resize) 70%, All Layers UNchecked. Line up her legs along the lower areas of the bars. (see my tag for idea) Move the poser layer to just under the Words layer.
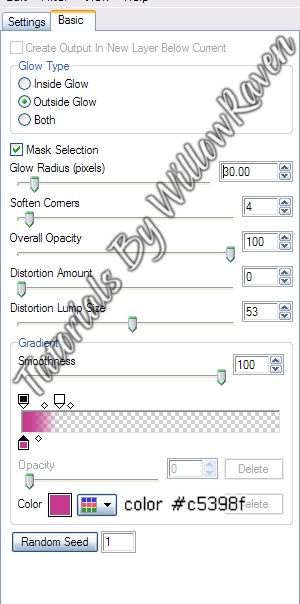
13. Do with the words layer the same steps you took for the stars. (You might need to zoom in to flood fill the letters. If you do, remember to zoom back to 100% when you are done.) When done, go to Eye Candy 5 Impact, Gradient Glow and apply the following settings:
Apply the following drop shadow:
Vertical and Horizontal: 1
Opacity: 75
Blur: 5.00
Color: black
Shadow on new layer: unchecked
14. At this point, apply elements as desired. (You may need to move your poser around - do so as needed/desired.)
15. Apply © information, scrap designer, tagger watermark on new layer. When happy with the look, merge visible.
16. Apply name/text to tag.
And you are done!
Thank you so much for checking out my tutorial and I would love to see your results if you try it!

