CT Creamsicle Tutorial
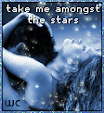
This is the tag we will be making:

Moderate level - Some knowledge of PSP is needed.
Materials Needed
Paint Shop Pro (used Version 9, but can be done on any version)
PTU kit "Tangerine Dream - Tagger Size" by Purple Dragonfly Creations which can be found HERE
Tube is "Creamsicle" by Cliff Thomas - you can get this amazing tube at Indie-Zine, HERE
Tag Template #33 by Babes Designz - At the moment, Babe's blog is down, so until such time as her blog is back up and running, I have provided the tag template, HERE
Mask of choice ... I used MelissazCreationz #10, found HERE
Floral Deco Brushes by ro-stock found HERE. Keep in mind that these are photoshop brushes, which come in .abr format. You can convert them to .png for PSP usage with an ABR viewer, found HERE. Once in png format, they can be imported in to your PSP brushes (File - Import - Custom Brush) -- or just use them in png format. I have also provided the .png in the zipfile with the tag template.
Filters Needed
Blinds - comes with PSP
Weave - comes with PSP
Fonts used
Ambitsek (for copyright info)
Whoop Ass Font by Blambot Fonts (for name/text), free for personal use
Please note that I typically add my drop shadows last. I will give the drop shadow settings that I have used (end of tutorial) HOWEVER feel free to use your own settings if you would like.
1. Open Tag Template. Shift+D to duplicate template, then close original, then delete the "copyright", "stitch" and "circle" layers. At this time, also open your mask and minimize in PSP.
2. Open paper2... copy & paste it as new layer just above the frame layer. Resize 85%, be sure all layers is UNchecked. Click on the circle layer then go to Selections - Select All ... Selections - Float .... Selections - Defloat, then Selections - Invert. Go to the paper layer and click your Delete button. Selections - Select None. Close out the Frame layer. Duplicate the paper layer, then on the bottom one, go to Adjust - Blur - Gaussian Blur ... by 4 pixels ... click OK. On the top paper layer, change the layer properties to Luminance (Legacy) at 100% opacity.
3. Go to you tube and, with your eyedropper tool, pick 2 colors, making the foreground color darker than the background color. I used two orange shades from her hair to go along with the color palette in the kit. When done, go to your materials palette, and go to Gradient and choose the following:
Foreground/Background
Style: Sunburst
Repeats: 8
Invert: not checked
Horizontal: 50
Vertical: 50
Link center and focal points: checked
Activate the "masked" layer on the template. Selections - Select All ... Selections - Float .... Selections - Defloat. Add new raster layer and then flood fill this new layer. You will actually have to do it several times before you start seeing color showing up (I had to click on it 10 times!). When satisfied, Selections - Select None. Change the layer properties to Overlay at 100% opacity. Duplicate this layer, and then change the layer property on this layer to Burn, 100% opacity. (So, in all you will have 2 layers of the flood filled layer, plus the original "masked" layer.) Apply the following drop shadow to the "burn" layer:
Vertical: 2
Horizontal: -2
Opacity: 65
Blur: 2.00
Color: Darkish Orange (#9a4202) ... you will want a darker shade of what you used for this layer
Shadow on new layer: unchecked
While still on the "burn" layer, go to the Blinds filter that comes with PSP and apply the following settings:
Width: 4
Opacity: 50
Color: Darkish Orange (use the same that you did for the drop shadow)
Horizontal: checked
Light from left/top: unchecked
Click OK, then apply again.
4. Copy/Paste your tube to your template, move to the top. Resize by 77% and place in the middle as best you can. It should now look something like this:

5. Copy and paste Paper12 as a new layer and then, in the layer palette, go to Arrange - Send to bottom. Go to Layers - New Mask Layer - From Image and use the following settings:

Merge - Merge Group. Apply Penta.com - Color Dot filter with the following settings:

(I use mine through Filters Unlimited so my filter 'screen' may look different than yours. ...just apply the same settings and you should be fine.)
Duplicate mask layer, move duplicate under the original mask layer. With the duplicate layer, go to Adjust - Blur - Gaussian Blur ... by 2 pixels - click OK. On the top layer, change the layer properties to Darken, 100% opacity.
6. Copy and paste element #7 to template, move to top. Apply Mura's Meister Copies with the following settings:

move the circle of 'brads' under your tube.
7. Open your Deco Floral Brush by Ro-Stock. Keep in mind that these are photoshop brushes, which come in .abr format. You can convert them to .png for PSP usage with an ABR viewer, found here: http://www.g1ga.it/abrviewer/ . Once in png format, they can be imported in to your PSP brushes (File - Import - Custom Brush) -- or just use them in the png format. I converted the .abr quite a ways back and did not import them as brushes, so I am just using the .png file. Given that information, take the floral deco and copy and paste as new layer to your template - move to top layer, then move the deco to the upper right corner, like this:

Duplicate, then flip, then mirror, so you will have it going from the bottom left to the upper right. Merge - Merge Down. Adjust - Color Balance - Manual Color Correction - change it to a color that complement the colors you are using (make it a medium to dark shade). Using the Weave filter that comes with PSP, apply the following settings:

Then move them just below the [closed out] frame layer.
8. At this point, continue to decorate the tag as desired with supplied elements. Because of the theme of the kit and the tube, I was sure to use the Creamsicle Ice Cream in the kit. When you are satisfied, resize to 525 pixels x 438 pixels ... 72.000 ppi.... Weighted Average ... "all layers" CHECKED. Feel free to use the crop tool to crop out any additional edges from the tag. Use the Sharpen option (Adjust - Sharpness - Sharpen) if needed to clarify your layers.
9. Apply any desired drop shadows to the layers ... I used the following with the Drop Shadow filter that comes with PSP on all layers EXCEPT my tube layer, the "masked" layers, the frame layer and the actual mask layers:
Vertical and Horizontal: 0
Opacity: 70
Blur: 7.00
Color: #9a4202 (or a dark shade of what you are using -- not black unless black is a major color on your tag)
On the top "Frame" and "floral deco" layers, I used the following drop shadow settings:
Vertical : 3
Horizontal: -3
Opacity: 50
Blur: 4.00
Color: #9a4202 (same that I used, above)
Shadow on new layer: unchecked
On the tube layer, I applied the following:
Vertical : 3
Horizontal: -3
Opacity: 50
Blur: 18.00
Color: black
Shadow on new layer: unchecked
I did not apply any drop shadow to the very bottom mask layers.
10. Apply crediting information and watermark. When satisfied, merge visible. (If you wish to make this a tag with a transparent background, be sure to close out the white 'background' layer before merging.) Apply name text and then you are done!
~NOTE~ For name/text:
I did the text at size 48, stroke 3.0 .. foreground color: #b45000 ... background color was Paper7 from kit at 50% (size) .... kern: 0
Then I duplicated the name/text and then, on the bottom one I applied the following gaussian blur: by 4.00 pixels
and then on the top name/text I applied the following drop shadow:
Vertical : 2
Horizontal: -2
Opacity: 60
Blur: 4.00
Color: black
Shadow on new layer: unchecked
and done!
If you try my tutorial, I would love to see what you come up with!
If you try my tutorial, I would love to see what you come up with!