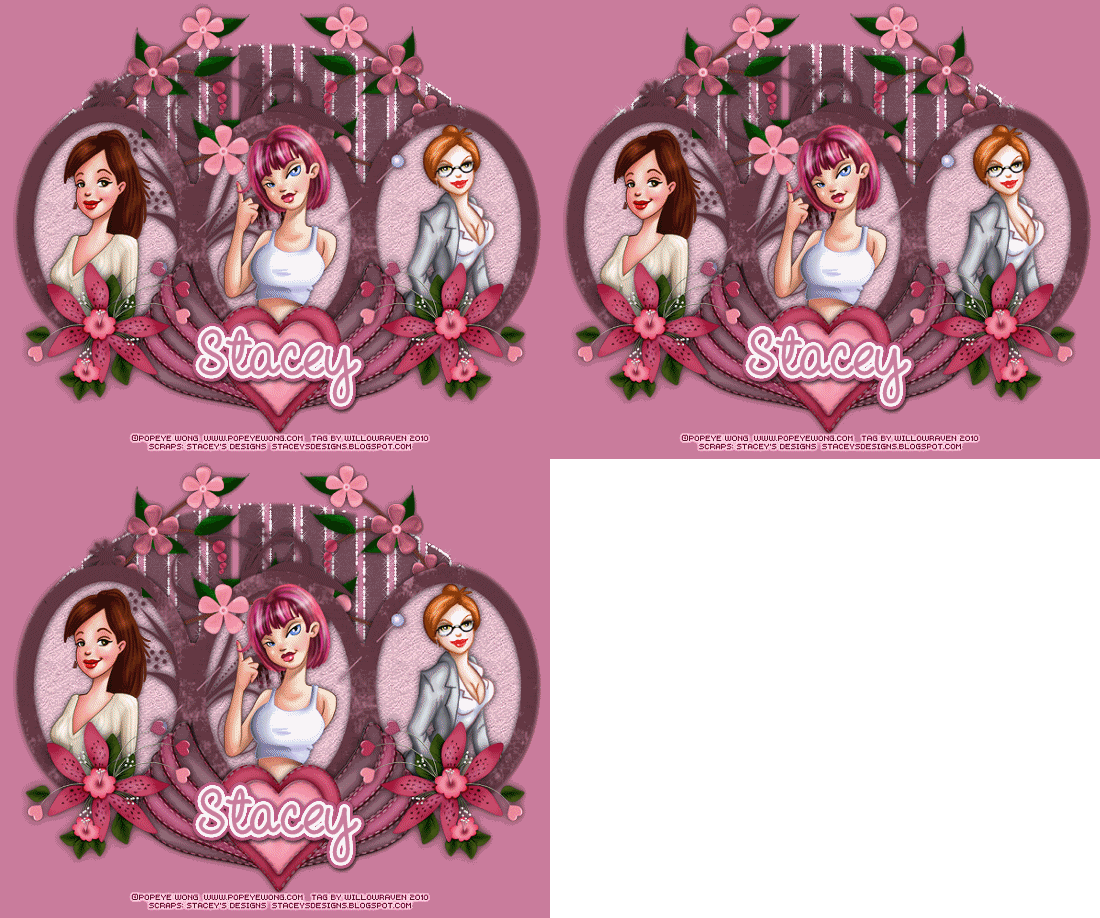
PTU kit called Game of Love by Staceys Designs which can be bought at Katelynn's Designs
Tubes by Popeye Wong which are Free To Use and can be found here (thanks Popeye!)
Mask - OvalSlatsMask.jpg – HERE
Fonts used:
2. Copy and paste the triple circle frame, do your best to center it. Feel free to close out the original.
3. Taking your preset shape tool, choose the ellipse (not the circle, but the oval), foreground and background medium gray, line width 2.0, draw an oval over one of the circles in the frame, like this:
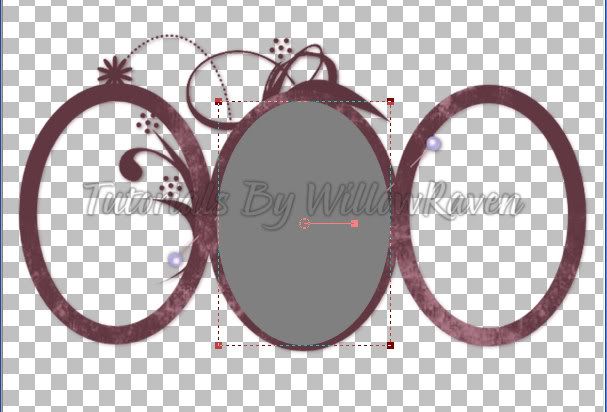
4. Copy and paste one of the papers from the kit (I am using Paper1). Feel Free to resize the paper (be sure 'all layers' is UNchecked ... I resized mine to 500 pixels x 500 pixels). Make the 3 oval layer active, then go to Selections - Select All.... Selections - Float.....Selections - Defloat. Go back to the paper layer, make active, then go to Selections - Invert, then click on the Delete key. You should now have the papers in the same area as the gray ovals. Move the paper layer below the frame layer but above the gray ovals layer.
5. Now, with the marching ants still active, copy and paste your tubes that you will be putting in the frames. When you are happy with how they are, just simply click the Delete key (since you have already Inverted the selection, it is set to delete everything outside of the frame area). Make sure that the image/tube layers are between the frame layer and the paper layer. Go to Selections - Select None.
6. Now, we have 2 frame areas that have doodles over them so we need to do something about it. Duplicate the images that are in that area, then move them above the frame layer. Take your eraser brush and use the following settings:
Size: 25
Hardness: 100
Step: 25
Density: 100
Thickness: 100
Rotation: 0
Opacity: 100
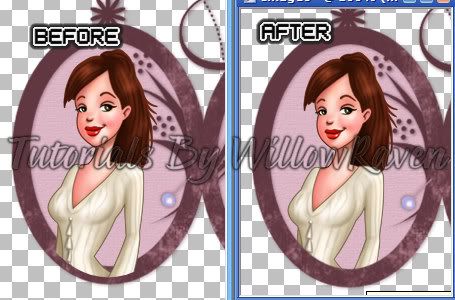
8. Go to the paper layer and make active. Go to Filters Unlimited, then Paper Textures, and choose the Filter Paper option and use the following settings:
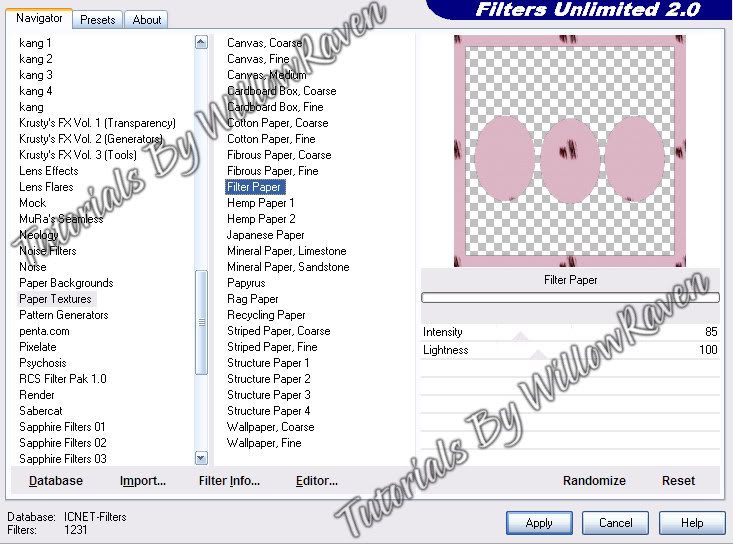
Close out the gray oval layer and the bottom layer (which should be blank) and Merge Visible everything else.
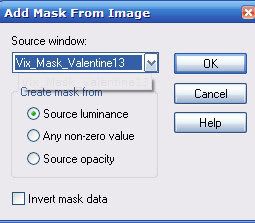
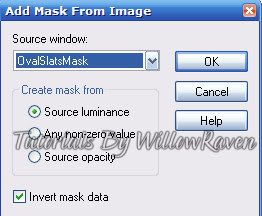
9. Move the frame up a little from the center. Take another paper and copy and paste it to the tag (I used Paper7), moving it below the frame. Resize it 600 pixels x 600 pixels (all layers UNchecked). Go to Layers - New Mask Layer - From Image and use these settings:
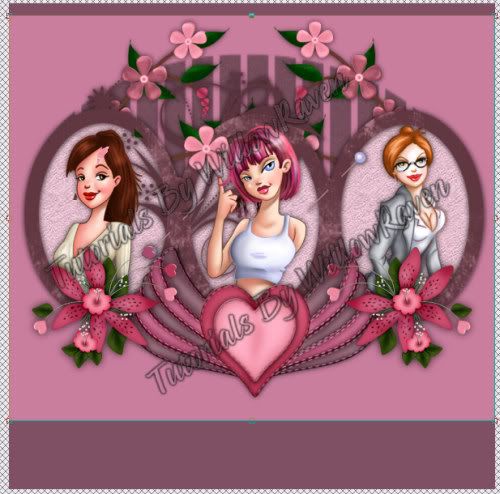
10. Take the winged heart element and copy and paste it to your tag. Bring it to the top, and resize it by 75% (all layers UNchecked) and place it under the frame, centered. Apply your favorite drop shadow to it. Take the Forget Me Nots element, resize it by 75% (again, all layers UNchecked), and move it over to behind the left side picture in the frame (see my tag for idea). Duplicate flowers, then Mirror. Erase whatever is hanging over the bottom of the frame areas. Take your selection tool and choose the upper area of both of the flower layers. Go to Edit - Copy, Edit - Paste as New Layer. (You will need to do this twice - once for each flower layer.) If needed, place them directly over their corresponding flowers. (They may copy and paste right in the same area, in which case no moving is needed.) Move both of these above the frame layer, then erase all the parts that hang over the framed images. Apply your favorite drop shadow to the bottom flower layers (not the top ones that you erased).
11. Copy and paste the decorated flower, resize by 40% (all layers UNchecked). Sharpen, if necessary. Place it below the left frame oval area and bring to top. Apply the following drop shadow:
Horizontal: 0
Opacity: 75
Blur: 15.00
Color: black
Shadow on New Layer: not checked
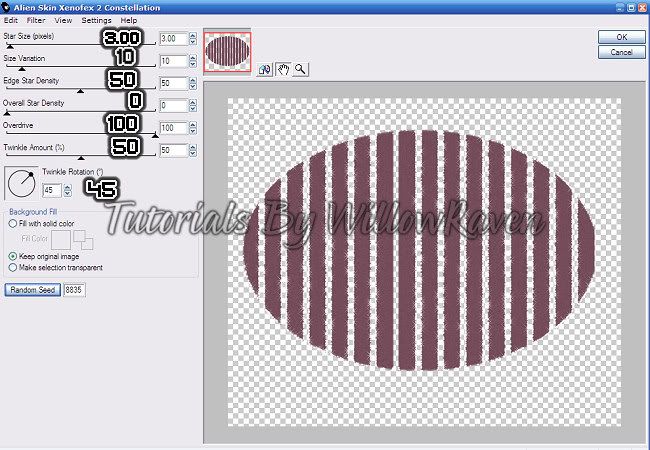
3. On a new raster layer, apply your copyright information, bring to top.
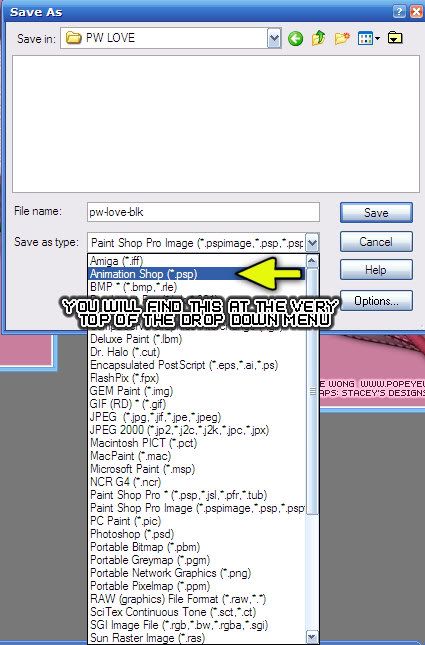
4. Ok, now - here comes the fun part. Close out the bottom 2 mask layers so that only the top one is showing. Go to Edit - Copy Merged ... Edit - Paste as New Image. Now, close out the top mask layer, and unhide the middle mask layer. Go to Edit - Copy Merged. Then go over to your other image and make it active (click on it) and go to Edit - Paste as New Layer. Now, go back to what you were working on, close out the middle mask layer and unhide the bottom one. Do the same thing that you did with the middle mask layer: Copy Merged, then go to the other image (which now has 2 layers) and click on it, then go to Edit - Paste as New Layer. You should now have 3 layers. This will be what you bring over to Animation Shop. Save as follows:
*transparent (next)
*Upper left corner of the frame, With the canvas color (next)
*Yes, repeat the animation indefinitely, 30 (next)
To check the speed of your animation, go to View - Animation. (Just click on the "X" in the upper right to stop the animation.) To Save this as a blank, go to File - Save As and save it in .gif format.

