Sunday, November 8, 2009
Mulberry Maiden Tutorial
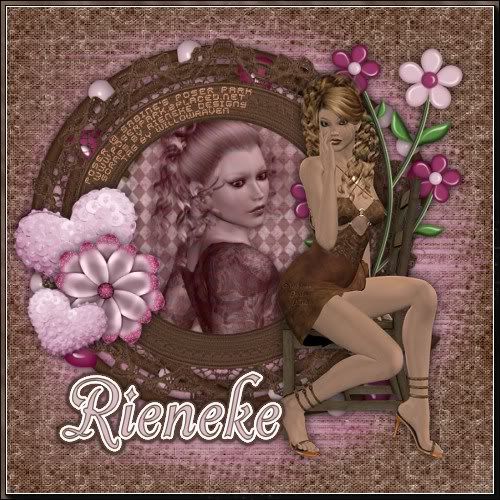
TUTORIAL: Mulberry Maiden
Moderate level - Some knowledge of PSP is needed.
Materials Needed
Paint Shop Pro (used Version 9, but can be done on any version)
PTU kit for Rieneke Designs ("Mulberry") which can be bought at Katelynn's Designs
Posers from Sabine's Poser Park (portrait47 and woman107)
Filters Needed:
Xero Fritilliary (freeware)
Filters Unlimited 2.0
AAA Foto Frame (freeware)
Eye Candy 5 - Impact Gradient Glow
Fonts used:
FFF Fuego (for copyright info)
Avalanche Script TT (for name/text)
DIRECTIONS
1. Open PSP
2. Open New Image, 600x600 pixels, resolution 72.000 pixels/inch, transparent checked
3. Open lace frame 3... copy & paste it as new layer. Resize it 75%, be sure "resize all layers" is UNchecked. Frame should be - for the most part - centered in your canvas. Move it SLIGHTLY to the left. Rename this layer "frame".
4. Click inside of the frame with your magic wand so you will see the marching ants. Go to Selections - Select All.... Selections - Float .... Selections - Defloat, then Selections - Modify - Expand ... choose 10 pixels, then click OK.
5. Open one of the papers in the kit (I chose paper5) and copy and paste as new layer. Move it to just under the frame layer. At this point, if the print of the paper seems too large for the tag, feel free to resize it. (I resized my paper by 85%.) Go to Selections - Invert. Click on the Delete Button. Do NOT get rid of the marching ants yet. Rename this layer "frame paper".
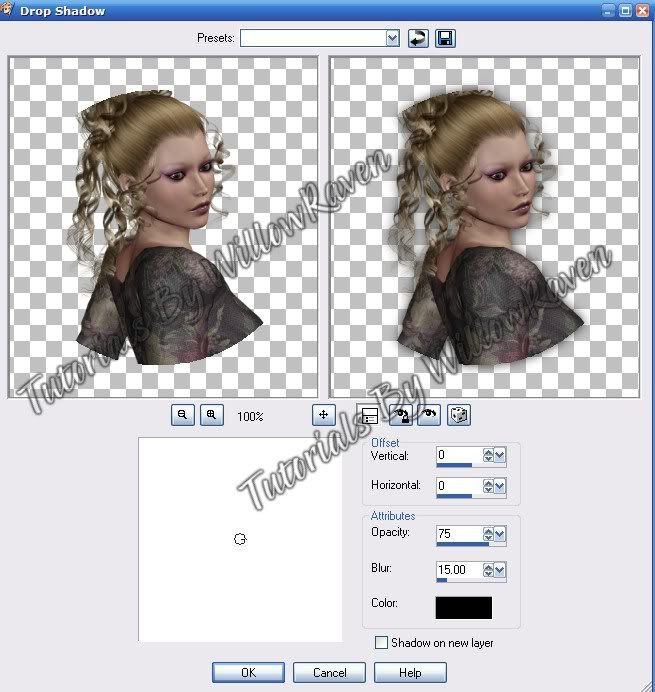
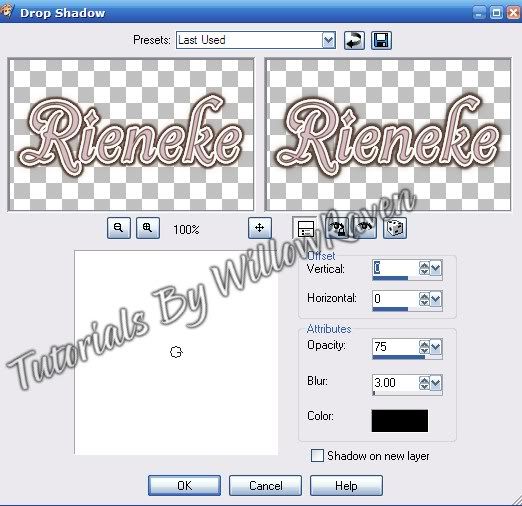
6. Open the image you will be using for inside the frame. (I am using portrait47 for this part). Copy & paste it as new layer, then move just under the frame but above the paper layer. Resize so that it looks nice and fits well inside the frame area. (I needed to resize my poser by 65%.) Be sure "resize all layers" is UNchecked when resizing. When you are happy with how it looks inside the frame, click on the delete button. Go to Selections - Select None (to get rid of the marching ants). Add drop shadow to image using these settings:
Rename this layer "frame image".
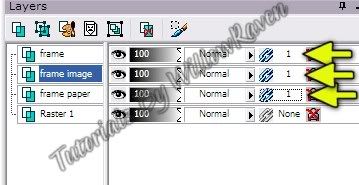
7. Go to your layer palette. Click on the locks for these 3 layers: frame, frame image, frame paper. Be sure they have the same number next to the locks, like this:
This way, if you move one of those layers, it will stay together.
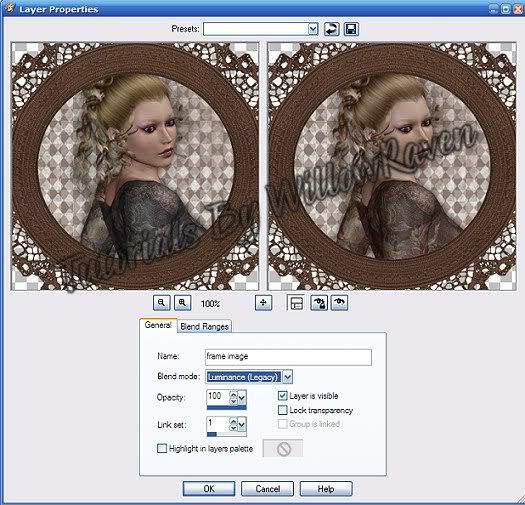
8. Cllick on the 'frame paper' layer to make it active and change to opacity to 50. Then click on the 'frame image' layer to make it active. Right click on it in the layer palette, go to Properties and use the following settings:
9. Open on of the papers in the kit (choose one that doesn't have a lot of obvious design - I chose paper1.) Copy & paste as new layer, move to bottom. Resize by 75%, "resize all layers" UNchecked. Rename this "background paper".
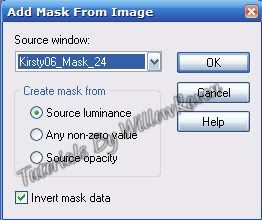
10. Open mask in PSP then minimize. Go to Layers - New Mask Layer - From Image and use these settings:
Go to your layer palette, right click on the background paper layer, then go to Merge - Merge Group.
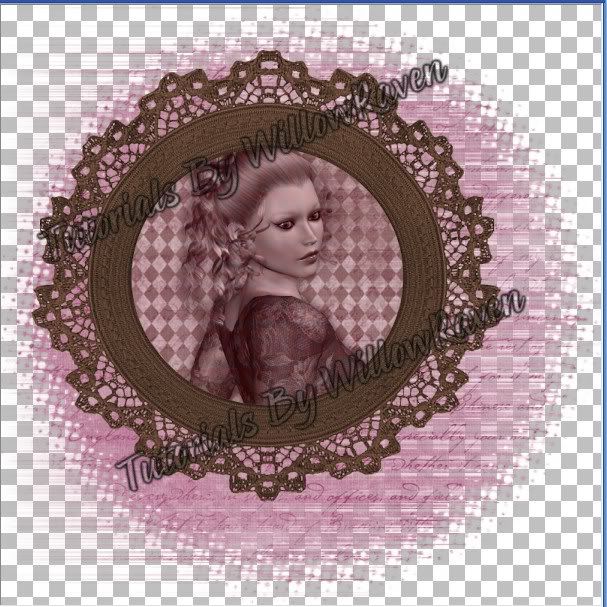
You should now have something like this:
11. Copy your other tube (I am using woman107 here) and paste as new layer. Move to top. Resize as needed. After resizing, sharpen if needed (sometimes image will get slightly blurred if resized quite a bit.) Move the image towards the right side of frame (see completed tag for idea of what I mean.) Use drop shadow settings we used before, except change blur to 22.00.
12. Choose a darker paper from kit (I chose paper10), copy and paste as new layer. Resize by 75%, "resize all layers" UNchecked. Rename this 'background'. Apply Xero Fritilliary filter with following settings:
Granularity: 6
Aggression: 30
Tesselation: 48
Variation: 40
13. Open flowers1 from kit. Copy and paste as new layer. Move up to just above the frame layer. Resize by 50%, "resize all layers" UNchecked. Rename layer 'flowers 1". Move to the right of the frame, behind the girl on the chair (see finished tag for comparison.) Add drop shadow from before, with blur set at 15.00.
14. Copy and paste heartstring element. Move to under the 'frame paper' layer. Go to Image - Mirror. Move it around so that the frame is in the center of this element. Use last used drop shadow settings.
15. Open heart1 element. Copy and paste as new layer. Resize by 50%, "resize all layers" UNchecked. Rename 'heart'. Move to the top. Move heart around so that it is on the left area of frame. Duplicate heart (go to layer palette, right click on the heart layer, then go to Duplicate.) Resize by 50%, "resize all layers" UNchecked. This will already be named "Copy of heart". Go to Image - Mirror, then move it near the larger heart, slighly to the right. Use drop shadow, applying last used settings on both hearts.
16. Make 'background" layer active. Go to Image - Resize and use the following settings - be sure that "resize all layers" is checked. Go to Filters Unlimited 2.0 - Paper Textures - Canvas, Fine with the following settings:
Intensity: 110
Lightness: 110
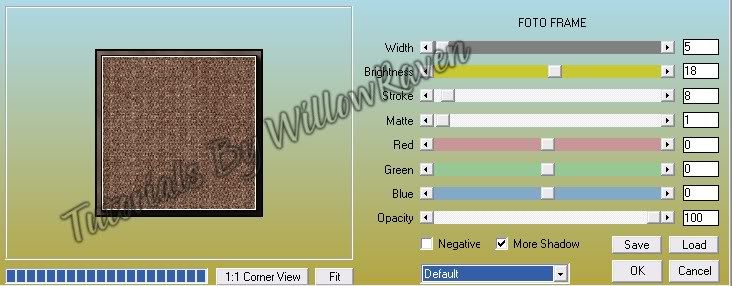
17. While still on the background layer, go to the AAA Foto Frame Filter and use the following settings:
18. Add any other elements you would like at this point.
19. Add copyright information, scrap designer information, tagger watermark.
20. Merge - Merge All Visible. Save as .jpg.
For name/text
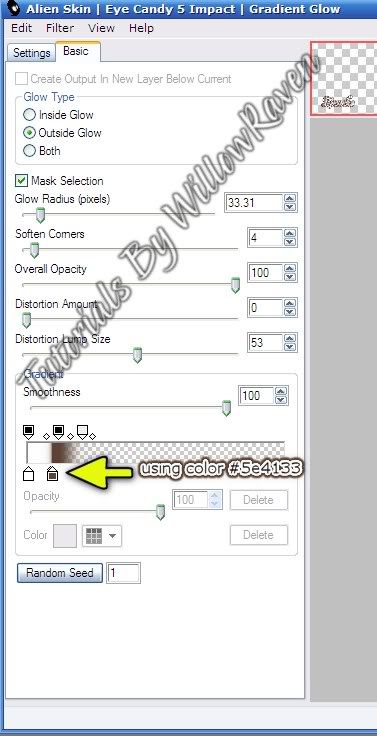
1. Using Avalance Script, size 62, stroke width 1.0 ...foreground #5e4133, background #dcbcc7, write your name and place it where you would like it. I am placing mine in the lower left side.
When satisfied, convert to raster. Use Eye Candy 5 Impact Gradient Glow with the following settings:
Then apply a drop shadow with the following settings:
Then go to Edit - Repeat Drop Shadow.
And you are done!!
I would love to see your results!!!
Subscribe to:
Post Comments
(
Atom
)






0 comments :
Post a Comment