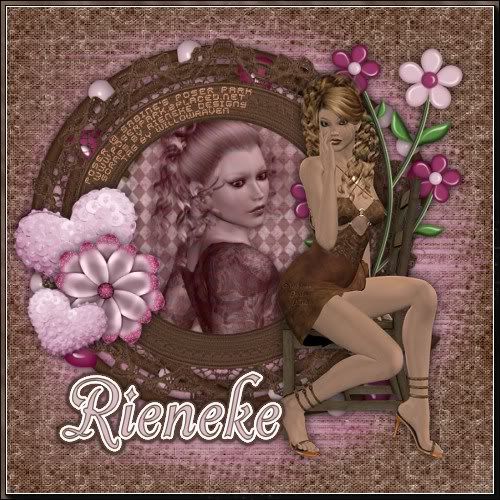
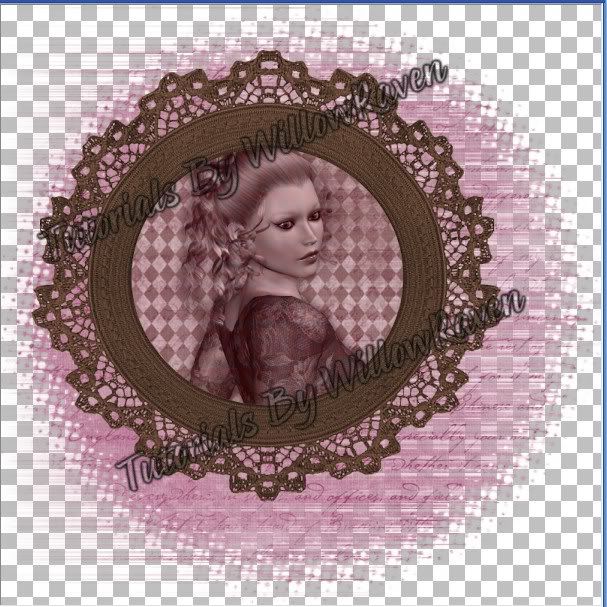
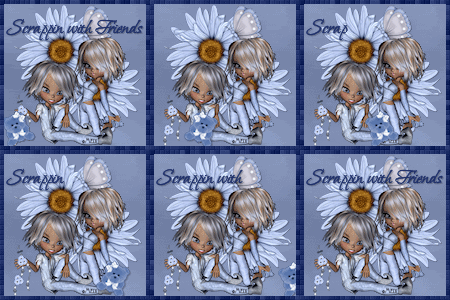
This is the tag we will be making:

This tutorial is written by me. Any similarities to any other tutorial is totally coincidental!
Beginner to Moderate level
Some knowledge of PSP is needed
Materials Needed
Paint Shop Pro (used Version 9, but can be done on any version) -- provide link
PTU kit for Sizzel's Designs ("End of Autumn - Tagger Size") which can be bought at Katelynn's Designs -
Tube: "Gold Butterfly Fairy" by Ronne Barton (used with MPT license, which can be purchased HERE)
Tag Template #78 from Simply Devilish Scrapz
Chelle's Mask #59
Filters Needed:
Weave (comes with PSP)
Blinds (comes with PSP)
Halftone (comes with PSP)
Xero Porcelain - Freeware
Eye Candy 4000, Gradient Glow
Fonts used:
FFF Fuego (for copyright info)
Black Rose(for name/text)
Directions
1. Open PSP, then open Tag Template. Shift + D to make copy of template, then close original. Then, on the copy we have open, either delete or close off the top layer that has the designers info on it.
2. From your tube, pick a dark color for your foreground and a lightish color (or contrasting color) for the background.
3. Go to "Multi Rectangle" layer, make active. Go to Selections - Select All.... Selections - Float .... Selections - Defloat. You should have marching ants around the rectangles. Take Paper2 from the kit and copy & paste as new layer, putting it above the "Multiple Rectangle" layer. Rename "Rectangles". Go to Selections - Invert. Click on the Delete Button.
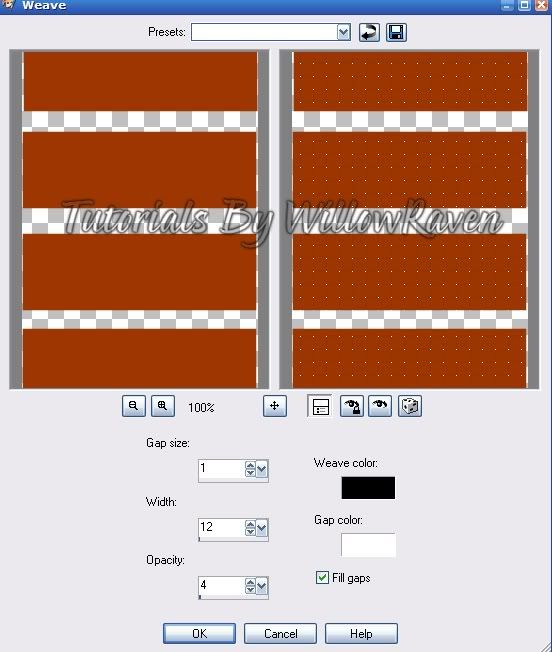
4. Keeping marching ants around your rectangles, go to Selections - Invert then go to Effects - Texture Effects - Weave and use the following settings:
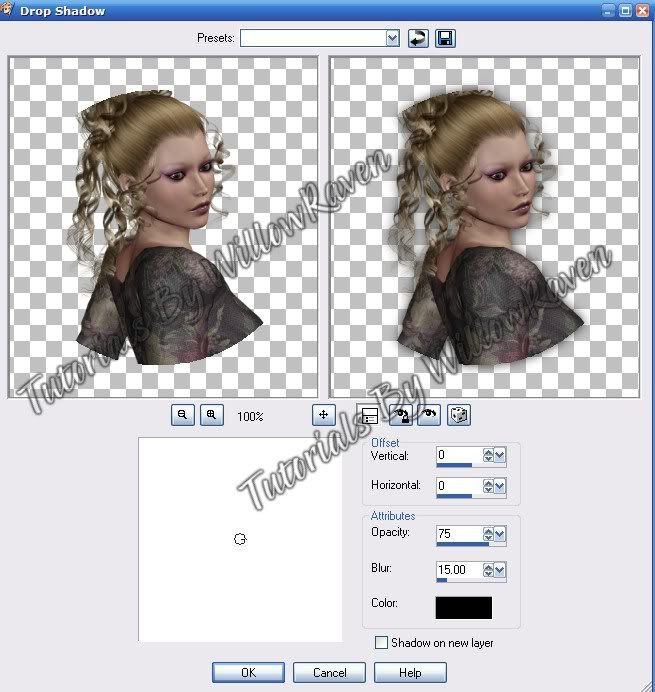
With the marching ants still around your rectangles, apply the following drop shadow (remember these settings as we will be using them throughout the tutorial for the drop shadow):
Vertical: 2
Horizontal: 1
Opacity: 40
Blur: 15.00
Color: Black
Shadow on New Layer: Unchecked
Go to Selections - Select None (to get rid of the marching ants).
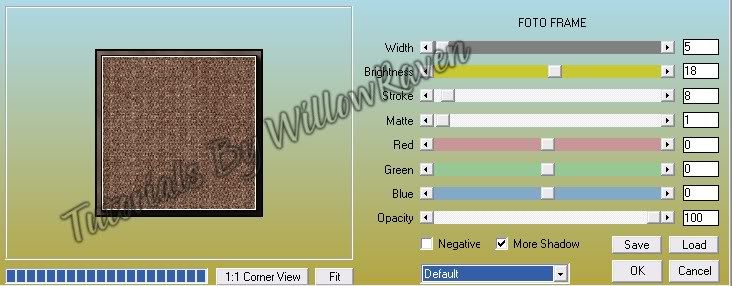
5. Go to "Rectangle 1" layer, make active. Go to Selections - Select All.... Selections - Float .... Selections - Defloat. Take Paper12 from the kit and copy & paste as new layer, putting it above the "Rectangle 1" layer. Rename "Frame". Go to Selections - Invert. Click on the Delete Button. Go to Selections - Invert, then go to Effects - Textures - Blinds and use the following settings:
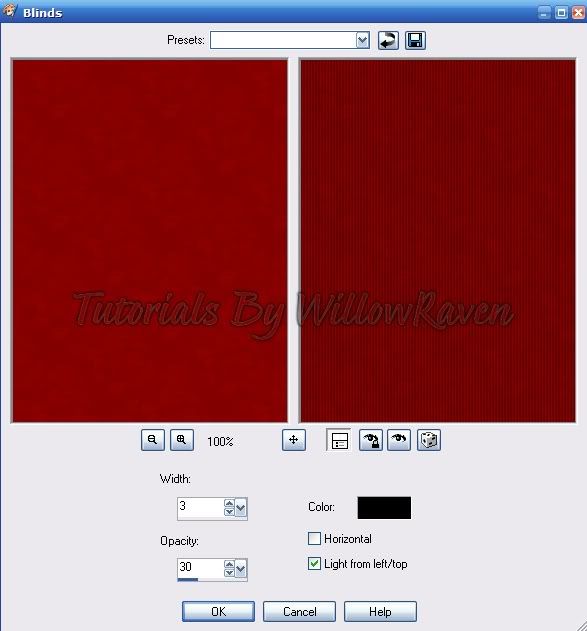
Apply previous drop shadow. Go to Selections - Select None (to get rid of the marching ants). Close out "rectangle1" layer.
6. Go to "Rectangle 2" layer, make active. Go to Selections - Select All.... Selections - Float .... Selections - Defloat. Take Paper8 from the kit and copy & paste as new layer, putting it above the "Rectangle 2" layer. Rename "Pic Background". Go to Selections - Invert. Click on the Delete Button. Go to Selections - Select None. Close out "rectangle2" layer.
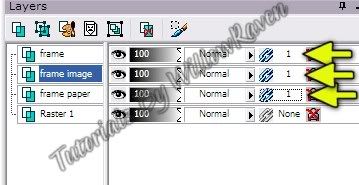
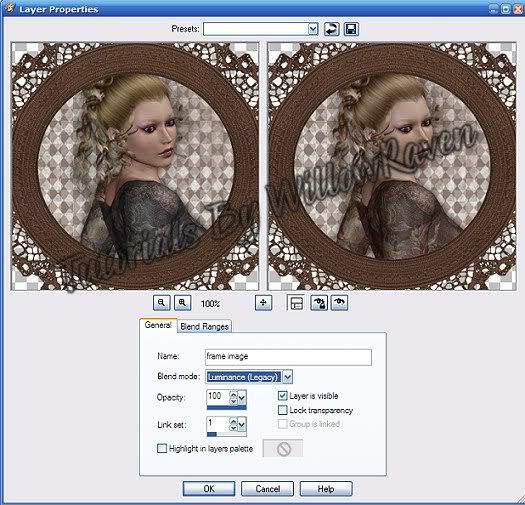
7. Copy your tube, paste as new layer right about the "pic background" layer. Resize it by 115% (be sure "Resize All Layers" is UNchecked). Center your enlarged image the best you can over the "pic background" layer. Rename this "enlarged tube". When you are pleased with your centering, go back to "pic background" layer, make active, then go to Selections - Select All.... Selections - Float .... Selections - Defloat. Then click back onto the enlarged tube layer, then go to Selections - Invert, then click on the Delete button. Then, with the marching ants still there, go to Selections - Invert, then go to Adjust - Blur - Gaussian Blur ... Radius: 10.00 and click OK. Right click on the "enlarged tube" layer in the Layer palette, go to Properties and use the following settings:
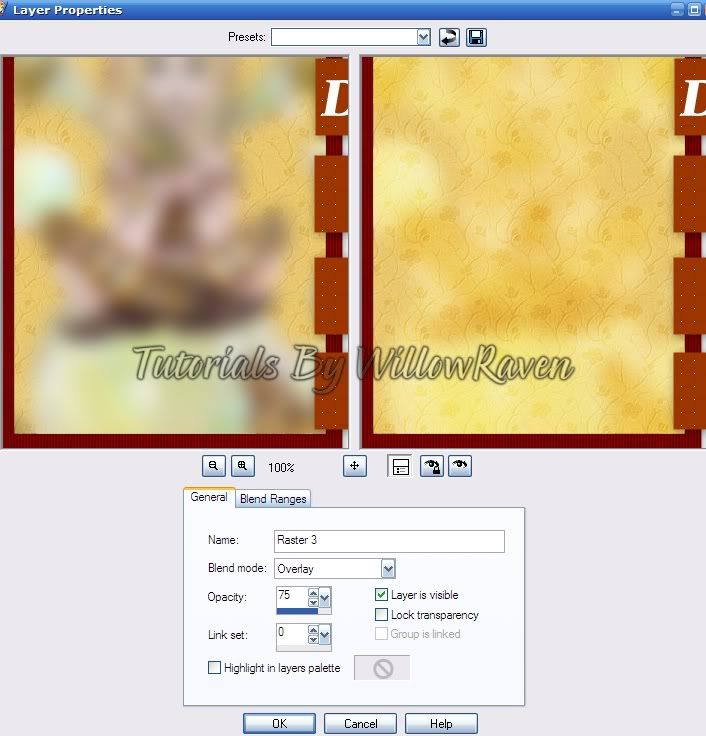
Apply the previous drop shadow settings, then go to Selections - Select None.
Apply the previous drop shadow settings on the "pic background" layer as well.
8. Take your tube, copy and paste as new layer on to your template, then move to top. Rename "tube" layer. Center over the "pic background" layer, resize as needed (I resized 90%, be sure "resize all layers" is UNchecked). Apply Xero Porcelain with the following settings:
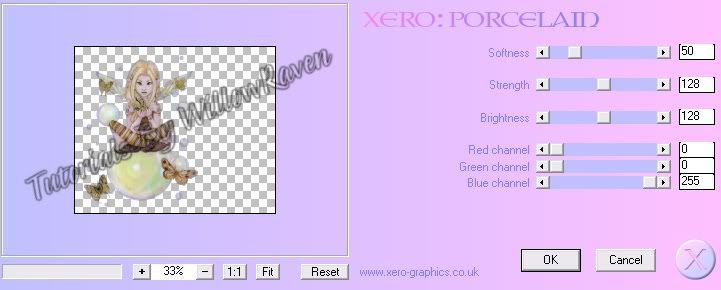
Apply drop shadow with these settings:
Vertical: 1
Horizontal: 0
Opacity: 50
Blur: 18.00
Color: black
Shadow on New Layer: UNchecked
9. Go to "Word Art" layer, make active. Go to Selections - Select All.... Selections - Float .... Selections - Defloat. Go to Layers - New Raster Layer. Flood fill the letters with one of the colors you choose (either foreground or background - I am using color #3d2826.) Close out the "wordart" layer. With the New layer with the wordart active, go to Effects - Artistic Effects - Halftone and use the following settings:
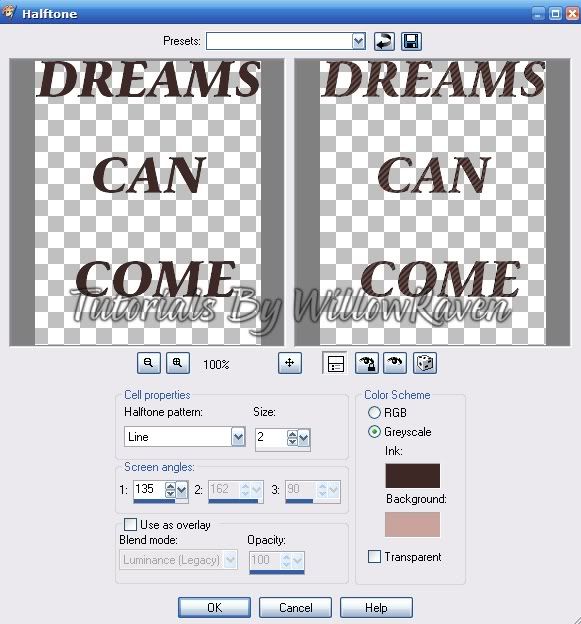
Go to Selections - Select None.
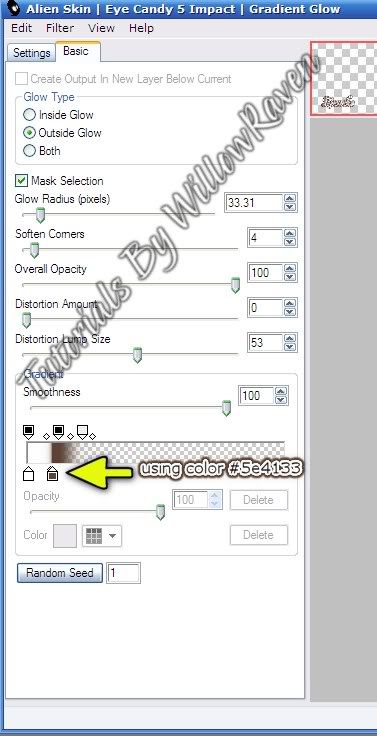
Apply Eye Candy 4000 - Gradient Glow with the following settings:
Glow Width: 4.00
Soft Corners: 25
Overall Opacity: 100
and here is how you will set the colors on the "color" tab:
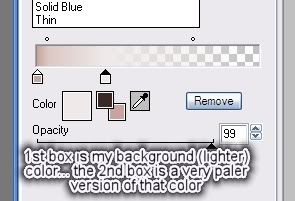
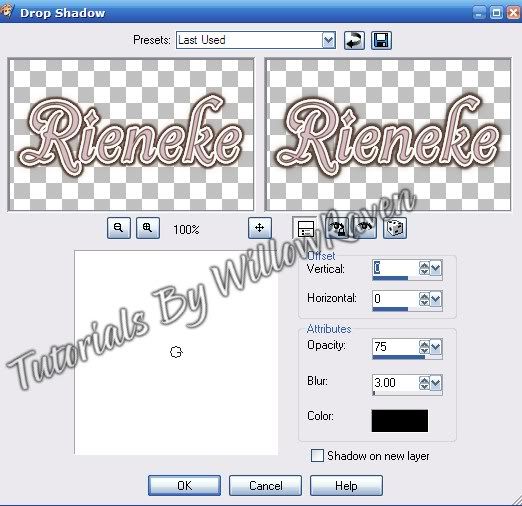
Apply drop shadow with the following settings:
Vertical: 1
Horizontal: 0
Opacity: 100
Blur: 3.00
Color: black
Shadow on New Layer: UNchecked
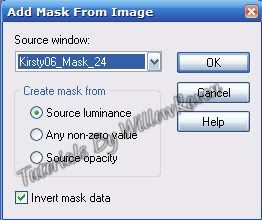
10. Click on the "Backing" layer, make it active, then copy and paste Paper6 just above that layer. Rename "mask layer". Open mask in PSP, then minimize. Go to Layers - New Mask Layer - From Image and use these settings:
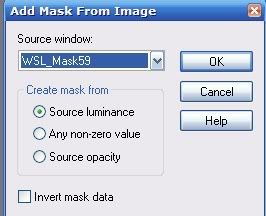
Go to your layer palette, right click on the "mask layer" layer, then go to Merge - Merge Group.
Apply following drop shadow to the masked layer:
Vertical: 1
Horizontal: 0
Opacity: 50
Blur: 3.00
Color: black
Shadow on New Layer: UNchecked
11. Copy Doodle 1 from Kit, paste to just under the tube layer. Place as you like, then apply the first drop shadow settings. Copy the original doodle 1 again, paste as new layer on the template. Rotate 25 degrees to the right (be sure "all layers" is unchecked). Move it around so it is under the rectangles and word art (see my tag for idea). Use the following drop shadow settings:
Vertical: 1
Horizontal: 0
Opacity: 50
Blur: 18.00
Color: black
Shadow on New Layer: UNchecked
12. Copy "jar" element, paste as new layer onto template, then move to top. Resize to 40%, then place as shown on the tutorial. Use following drop shadow settings:
Vertical: 1
Horizontal: 0
Opacity: 50
Blur: 3.00
Color: black
Shadow on New Layer: UNchecked
Continue to decorate the tag with butterflies, as desired.
13. Resize all layers to 500 pixels x 417 pixels. Sharpen any layers that are a bit blurry.
13. Apply copyright information, scrapper information, tagger information. When happy with tag, Merge Visible, save as .jpg.
14. Apply name using the foreground and background colors you chose at the beginning of the tutorial. On mine, after I applied the actual text, I then applied Eye Candy 4000 with the previous settings, and then modified the colors on the color tab to this:
first box: color #ebe2d6
second box: color #3d2826
and I just fiddled with the boxes til I got a look that I liked.
Then I applied the following drop shadow:
Vertical: 1
Horizontal: 0
Opacity: 85
Blur: 3.00
Color: black
Shadow on New Layer: UNchecked
Repeat drop shadow.
And we are done.
I would love to see your results!

